

Youtube2mp3 is a well-known YouTube 2 mp3 converter that lets you convert YouTube videos to MP3 and MP4 files and download them for free.
The Youtube2mp3 Y2mate setup works on PCs, phones, and tablets, so you can use it whenever and anywhere you want.
Top 12 Best Youtube2mp3 Y2mate Alternatives In 2021
In this article, you can learn about Youtube2mp3 Y2mate Alternatives. Here is the information below;
1. VidToMP3.com

To convert YouTube videos into MP3 files, use VidToMP3.com’s simple online video converter mechanism. After the videos have been converted, you will be able to download the converted videos from YouTube.
This software even allows you to download high-quality YouTube videos. It’s a new online video transformation structure that allows users to download noise from non-copyrighted videos on any video sharing and leaking website.
2. YouTubeConverter
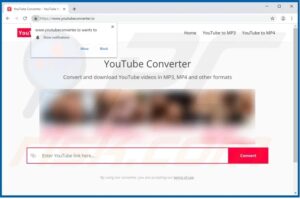
YouTubeConverter. It is a free online converter that allows you to instantly convert YouTube videos to MP3. YouTubeConverter is the tool to use if you need to convert a YouTube2mp3.net video to MP3 and download it. It is planned in a similar manner for the same rationale.
It will enable you to convert videos into sound at a rapid rate. The nicest thing about YouTubeConverter is that it does not force users to convert videos in a specific quality. It allows them to choose between three quality levels: low, medium, and high.
3. OnlineVideoConverter.com
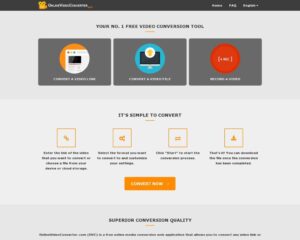
OnlineVideoConverter.com is a free online video converter that lets you convert any video link or file to a variety of formats. It’s a straightforward, easy-to-understand tool that you may use from anywhere in the world.
The programme is compatible with all recent web browsers and is often regarded as the best online video converter. It converts audio and video files to a variety of high-quality formats. It is an add-on to ClipConverter.CC that includes all of the main features as well as some new tools and rapid service.
4. ClipConverter.cc

ClipConverter.cc is one of the greatest free online media conversion tools available, allowing you to convert and download audio and video files. MP3, MP4, 3GP, MOV, MKV, and other popular audio and video formats are all available through the site.
Sites like ClipConverter interacts with practically all of the leading streaming websites, including YouTube, Vimeo, Facebook, Twitter, and many others, making it one of the greatest solutions available. The option works in the same way as the rest of the media conversion choices. It does, however, provide fast converting and downloading speeds, which improves your overall experience.
5. 2conv.com
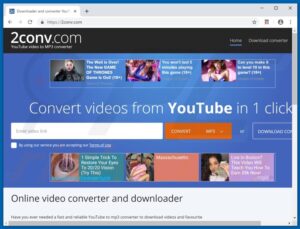
2conv.com is a simple but effective online video converter and Video downloader that allows you to quickly download any YouTube video in MP3 format. It’s an alternative to ClipConverter.CC that offers all of the same functions as ClipConverter.CC but with a fresh user interface and additional fascinating features.
All you have to do is copy and paste your YouTube links into the text bar, and Converter will take care of the rest. Your mp3 file will be ready in a matter of seconds for you to play or download. You may also use this to convert and download mp3 files from other platforms such as Facebook, Vimeo, and others.
6. AnyThing2MP3.com

It is a multiplatform video and sound converter, just like its name AnyThing2MP3.com, that can convert video and noise from any video and sound spilling and sharing platform. The nicest thing about AnyThing2MP3.com is that it also supports the transformation of SoundCloud sound clips. YouTube2mp3.cc is most likely the most popular site whose videos it transforms, but it also supports the various other prominent video leaking and sharing services. Alternatives to mp3clan can also be found.
Following the conversion of the desired video to MP3, you can then download it to save in the structure. It is simple to convert to a video that requires customers to provide the video’s connection by inserting it into the AnyThing2MP3.com video connection or converter box. Currently, you must remain seated for a short period of time in order for the modification to take effect.
7. AudioTube.org

AudioTube.org is a free video to mp3 converter that converts YouTube videos to MP3. This website sells a one-of-a-kind video conversion structure that may be played on any computer or electronic media player.
All you have to do is send your YouTube 2mp3 video URL to AudioTube.org, and your video will be converted to mp3. It will just take a few minutes after the transition. You can then download your converted video as well.
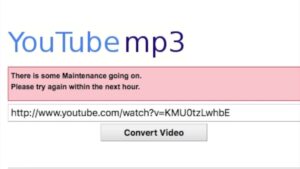
8. YouTube-mp3. org
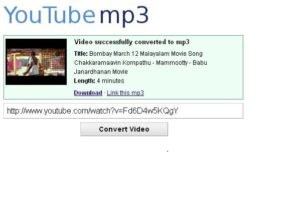
YouTube-mp3. org is an all-in-one online converter for converting YouTube videos to video and audio formats. It is a simple to use service that can be used on a PC, Smartphone, or Tablet. The videos are always being turned into the best possible quality.
All you have to do is send a link to your YouTube video to YouTube-mp3. org, and your video will be converted into a sound format. You may then download your converted over video after the reliable improvement, which will take only a few minutes.
9. YouTubeInMP3.com
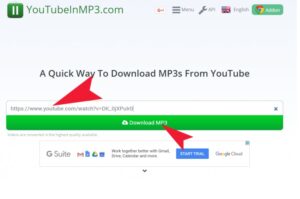
YouTubeInMP3.com is a website that allows users to convert any YouTube video to MP3 format. It’s the name of a quick, easy-to-use, and highly customizable online YouTube video to MP3 sound converter.
YouTubeInMP3.com even supports the downloading of videos and sound, regardless of what is changing throughout the video. You’ll be able to make similar changes to your video before switching it over. There is no need to download anything or enhance it in any way.
10. Mp3 Converter
Mp3 Converter is a straightforward YouTube to MP3 converter youtube that allows you to convert and save your favourite YouTube videos in MP3, MP4, F4V, and 3GP formats. It’s a simple and quick converter platform that’s also compatible with a variety of other online video sites, such as Facebook, Dailymotion, Vimeo, and SoundCloud, among others.
To convert and download a video, copy and paste the URL of the video you wish to convert. After you’ve added the link, choose an output format and hit the start button. Your file will be ready to download in less than a minute.
11. MP3Fiber.com
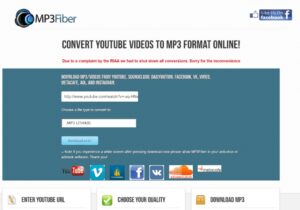
MP3Fiber.com is an online YouTube video to MP3 converter known for providing malware and infection-free conversions to its users. To begin, connect to the video, then convert to MP3Fiber.com’s conversion box, and then select the type of sound you require.
On the off chance that you choose the higher quality, you will be given a sound with a large size.
12. YouTube to MP3 Converter— YTBmp3
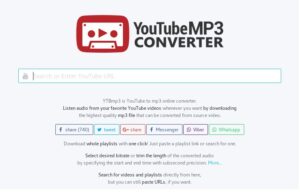
YouTube to MP3 Converter– YTBmp3 is a free web tool that allows you to convert YouTube videos to MP3 or MP4 files and download them instantly. It’s one of the best YouTube to MP3 converters for desktop, laptop, and mobile devices.
The website is 100% free to use and does not require any kind of setup or registration. You must paste the YouTube video URL into the convector, select a format, and then click the transform button. The website converts your movie in within a minute, which you can quickly download by clicking the download button.